Stitch-assist Procedures (Scanning a Document Larger than Document Glass)
Solution
Use this function to scan a document larger than the document glass. The stitch-assist function scans the left half and then the right half of an item, and merges both halves into one image.
Select [Stitch-assist (11"x17")], [Stitch-assist (A3)] or [Stitch-assist (Platen x2)] in [Paper Size] to perform this function.
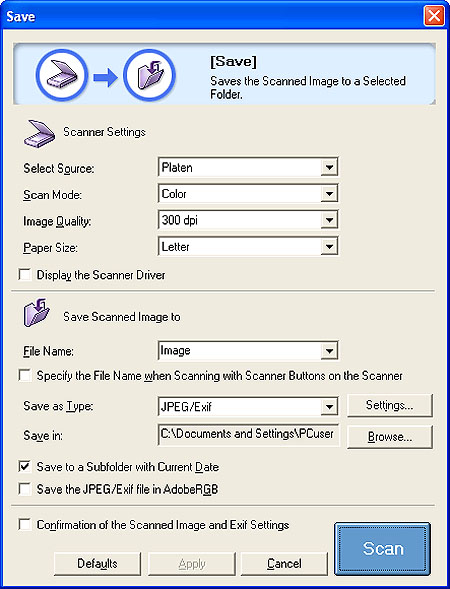
This function can be used with [Copy], [Print], [Save], [PDF], [Photo-1], and [Photo-2] buttons on CanoScan Toolbox. Here, the [Save] button is used as an example.
Windows:
Click the [Start] menu and select [(All) Programs] – [Canon Utilities] – [CanoScan Toolbox 5.0], and click [CanoScan Toolbox 5.0].
Macintosh:
Open the [Applications] – [Canon Utilities] – [CanoScan Toolbox 5.0] folders, then double-click the [CanoScan Toolbox 5.0] icon.
5.Select [Stitch-assist (11"x17")], [Stitch-assist (A3)] or [Stitch-assist (Platen x2)] in [Paper Size].
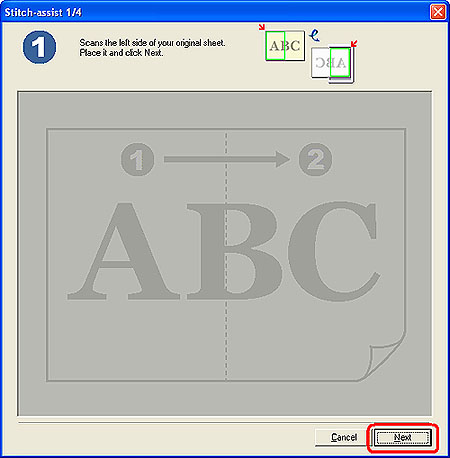
The left half of the item will be scanned.
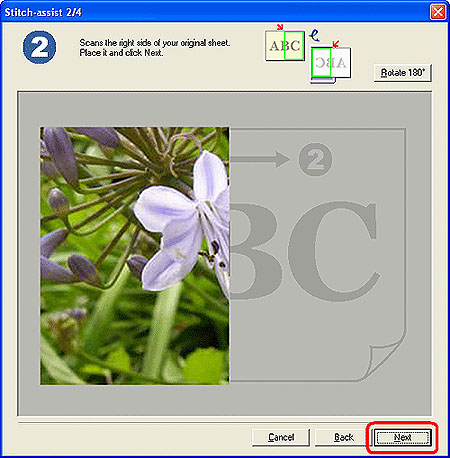
The right half of the item will be scanned.
If the document is scanned upside down, the image in  is also displayed upside down. Click [Rotate 180°] to display the image correctly.
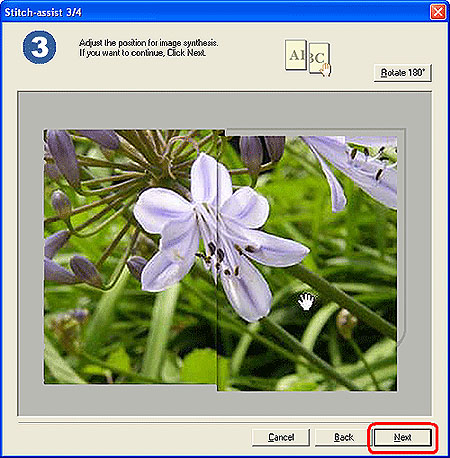
is also displayed upside down. Click [Rotate 180°] to display the image correctly.9.The 3 window is displayed. Drag the right half of the scanned image to adjust the position, and click [Next].
If the document is scanned upside down, the image in  is also displayed upside down. Click [Rotate 180°] to display the image correctly.
is also displayed upside down. Click [Rotate 180°] to display the image correctly.REFERENCE
- There may be color variations between the left and right halves depending on the document used or how it is set on the document glass.
- When adjusting the image position, the last clicked half of the image comes forward.
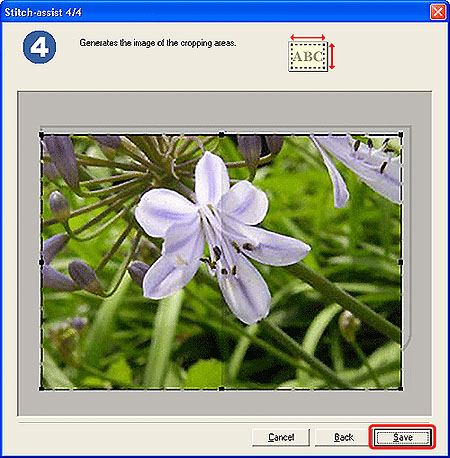
10.The 4 window is displayed. Drag the mouse to crop the area to scan, and click [Save] ([Print] with [Copy] function, [Forward] with [Photo-1]/[Photo-2] functions, and [OK] with [Print] and [PDF] functions). To readjust the position, click [Back] to return to the step 9.