
Sending images to a computer (Wi-Fi function) (PowerShot S110)
Solution
Using a wireless LAN, you can send and receive still images and movies from a camera to a computer.
NOTE
- Connecting a camera to a computer over a wireless LAN requires Windows 7 Service Pack 1 / Mac OS X v10.6.8 or later.
- When connected to a computer, the camera is used to establish the connection and then the computer (included software CameraWindow) is used to transfer images.
- Be sure to also read the user guide included with your access point.
1. Press the <Playback> ( ) button on the camera.
) button on the camera.2. Press the <Up>( ) button on the camera.
) button on the camera.
NOTE
When making the settings for a wireless LAN for the first time, a screen will appear for you to register a nickname for the camera.
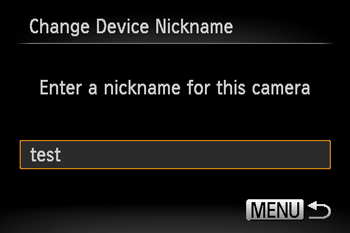
Press the c ( ) button , enter a nickname using the keyboard.
) button , enter a nickname using the keyboard. This nickname will appear on other devices on the wireless LAN when connecting from them.
3. Operate the <directional buttons> to choose ( ) and then press the <FUNC./SET> ()button.
) and then press the <FUNC./SET> ()button.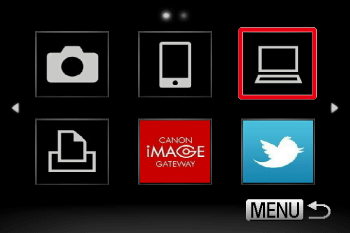
4. Operate the <directional buttons> up or down to choose the computer name, and then press the <FUNC./SET> () button.
) button.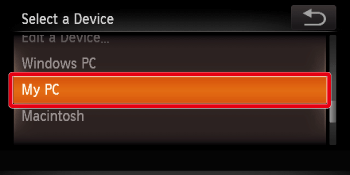
NOTE
If the computer you want to connect to does not appear select [Add a Device], and then add the computer to the access point. For information on how to add the computer, please see either Connecting easily to a wireless LAN (WPS Setup) (PowerShot S110) or Connecting to a wireless LAN (Manual Setup) (PowerShot S110).
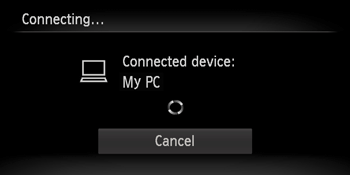
5. The following screen appears.
IMPORTANT
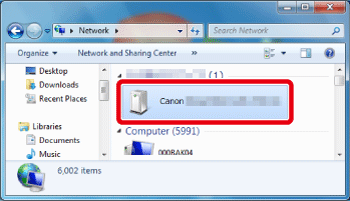
When connecting the camera to a computer for the first time, it is necessary to follow the steps below to install a driver on the computer (Windows only).
Click [Control Panel] > [Network and Internet] > [View network computers and devices], and then double-click the connected model on the [Other Devices] screen to start the installation of the driver.
6. After the camera and computer connection has been completed, a screen like the one below will appear on the computer. (At this point, nothing will appear on the camera's LCD screen.)
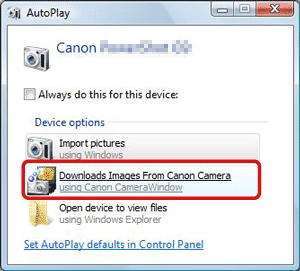
Click [Downloads Images From Canon Camera using Canon CameraWindow].
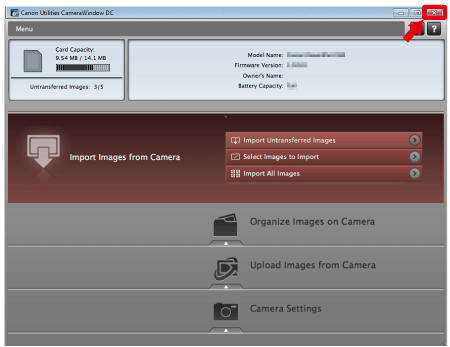
7. The [CameraWindow] menu appears. Click  [Import Images from Camera].
[Import Images from Camera].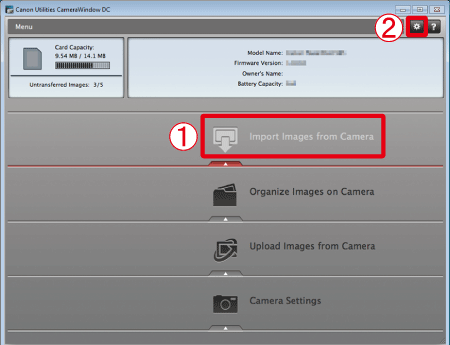
REFERENCE
By default, the imported images will be saved separated by each shooting date in the picture folder.
To change the destination folder, click  (
( ) in the upper-right corner of the window shown in Step 8, and then follow the procedure below.
() in the upper-right corner of the window shown in Step 8, and then follow the procedure below.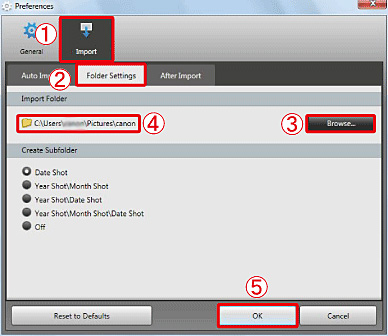
Click [Import] > [Folder Settings] >  [Browse], and specify a folder as the destination folder.
[Import] > [Folder Settings] > [Browse], and specify a folder as the destination folder. Confirm the destination folder  that you have specified.
that you have specified.Then, click  [OK].
[OK].
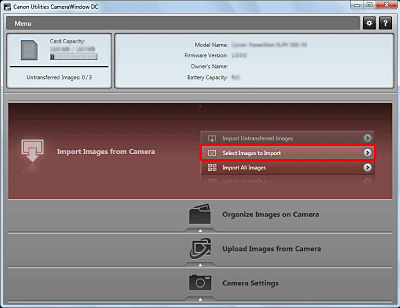
[OK].8. A window like the one shown below appears, so click [Import Untransferred Images] or [Import All Images].
[Import Untransferred Images] or [Import All Images].
REFERENCE
8-1. To select and import images, click [Select Images to Import] in Step 8.
8-2. Select the images you want to import, and then click [Import] ( ).
).
the images you want to import, and then click [Import] ().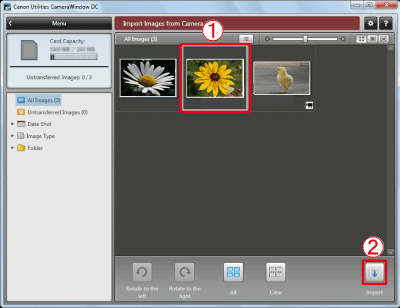
8-3. The software starts importing images. After this step, please follow the subsequent procedures below.
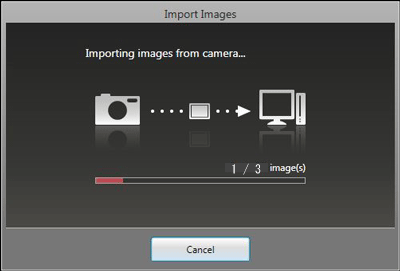
9. The following window appears, and the computer starts to transfer images from the camera.
10. Click [OK].
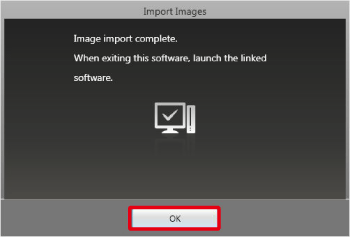
11. The following window appears.
Click the ( ) button to close this window.
) button to close this window.NOTE
A related application ([ImageBrowser] by default) will start automatically and the imported images are displayed.