
Using Picture Style Effectively (PowerShot G7 X Mark II)
Solution
Using Picture Style, you can set what kind of corrections you are going to make before shooting.
Picture Style functions and the procedures for customizing picture styles are explained in the following sections.
IMPORTANT
What is a Picture Style?
Selecting a Picture Style allows you to obtain image characteristics matching your photographic expression or the subject. If you set the appropriate style for what you want to express before taking pictures (for example, the Portrait setting for shooting people, or the Landscape setting for shooting the sky and deep green trees), there is no need to edit images with retouching software afterwards because they will be recorded with desired characteristics.
It also prevents the image degradation that occurs when resaving image files with retouching software.
You can choose your preferred colors as a Picture Style to suit the picture representation and subjects. Eight Picture Styles are available, and each can be further customized.
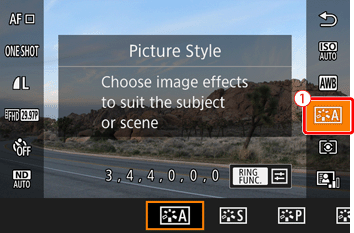
1. Set the camera's power switch to [ON].
2. Press the [  ] button and choose "Picture Style" (
 ) in the menu by pressing the [
  ] or [
  ] buttons.
] button and choose "Picture Style" () in the menu by pressing the [ ] or [ ] buttons. 
REFERENCE
The Picture Style is set automatically to [  : Auto ] until you customize the default settings.
: Auto ] until you customize the default settings. 3. Press the [  ] or [
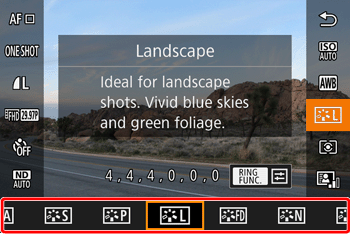
  ] buttons to select the desired style, then press the [ ] button.
] or [ ] buttons to select the desired style, then press the [ ] button.
| Picture Styles | Explanation |
|---|---|
| : Auto | Automatically adjusts colors to suit the shooting conditions. Makes pictures of blue skies, greenery, and sunset colors more vivid in scenes of nature, outdoor, and sunsets. |
 : Standard : Standard | Makes pictures more vivid and sharper. Generally, this setting can be used for most scenes. |
 : Portrait : Portrait | Makes pictures slightly sharper, with clear skin tone. Ideal for close-ups of people. You can adjust skin tone by changing [Color tone]. |
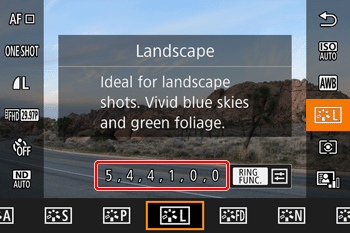
 : Landscape : Landscape | Makes pictures much sharper with more vivid blue skies and greenery. Ideal for impressive landscape shots. |
 : Fine Detail : Fine Detail | Used for rendering sharper edges and intricate textures. Makes pictures slightly more vivid. |
 : Neutral : Neutral | Used for images to be processed on a computer. Makes pictures natural-colored with a subdued appearance. |
 : Faithful : Faithful | Used for images assumed to be processed on a computer. Faithfully reproduces the actual colors of subjects as measured under daylight with a color temperature of 5200 K. Makes pictures have a toned-down color with a subdued appearance. |
 : Monochrome : Monochrome | Creates black and white pictures. |
  : User Def.1-3 : User Def.1-3 | You can register basic styles, such as [Portrait], [Landscape], and Picture Style files, and customize them. |
- Picture Style settings available in each Shooting Mode:
 .
. 4. Once you choose desired Picture Style, its icon will apear on the screen.

NOTE
- Default settings [ :Auto] are used for [ ], [ ] and [ ] until you add a Picture Style.
- You can also configure this setting by accessing [MENU]
 [
[  ] tab [Picture Style].
You can customize a Picture Style by adjusting individual parameters such as [Sharpness] and [Contrast]. To see the resulting effects, take test shots.
1. Follow the procedure in "Selecting a Picture Style (Customizing Colors)" to choose the Picture Style you wish to customize.
2. Press the [  ] button to display the Setting screen.
] button to display the Setting screen. 
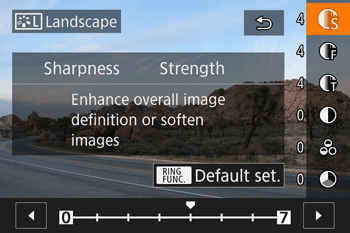
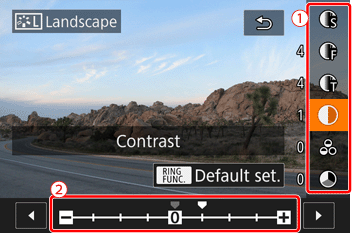
3. Press the [ ] or [ ] buttons to select option (), and [ ] or [ ] to configure( ).
).
] or [ ] buttons to select option (), and [ ] or [ ] to configure().
NOTE
- To reset the changes, press the [ ] button.
- Please refer to the chart below for setting options and the resulting effects.
| Parameter Settings | Effects | |
|---|---|---|
| Sharpness |  : Strength : Strength | Adjusts edge enhancement level. For softer (more blurry) images, set a lower value, and for harder (sharper) images, set a higher value. |
 : Fineness : Fineness | Indicates the edge thinness that sharpness enhancement applies to. For more enhanced details, set a lower value. | |
 : Threshold : Threshold | Specifies how much difference in contrast between edges and surrounding areas there should be to enhance edges. To enhance edges with smaller contrast difference, set a lower value. Note that if you set a lower value, noise may be emphasized. | |
 : Contrast : Contrast | Adjusts contrast. For lower contrast, set a lower value, and for higher contrast, set a higher value. | |
 : Saturation*1 : Saturation*1 | Adjusts color saturation. For less intense colors, set a lower value, and for more intense colors, set a higher value. | |
 : Color tone*1 : Color tone*1 | Adjusts skin tone. For more red tone, set a lower value, and for more yellow tone, set a higher value. | |
 : Filter effect*2 : Filter effect*2 | Emphasizes white clouds and green trees in monochrome images. N : Normal monochrome images with no filter effect. Ye : Blue skies look more natural and white clouds stand out better. Or : Blue skies look slightly darker. Glow of sunsets is emphasized. R : Blue skies look much darker. Colored leaves look clearly brighter. G : Skin tones and lips of people look muted. Green leaves of trees look clearly brighter. | |
 : Toning effect*2 : Toning effect*2 | Available monochrome colors : [N : Non] ] , [S : Sepia] , [B : Blue] , [P : Purple] , or [G : Green]. | |
].*2 : Only available with [
].4. Press the [ ] button to complete the settings.
] button to complete the settings. 
- Setting changes will appear on the screen.
NOTE
- [Fineness] and [Threshold] of [Sharpness] are not applied to movies.
- If you set higher [Contrast], [Filter Effect] is more emphasized.
5. Press [ ] once again to go back to the shooting screen.
] once again to go back to the shooting screen.
- Selected Picture Style icon will appear on the screen.
You can customize basic styles, such as [ ] and [ ], and register them. You can prepare several styles with different sharpness and contrast settings.
] and [ ], and register them. You can prepare several styles with different sharpness and contrast settings. 1. Set the camera's power switch to [ON].
2. Press the [ ] button and select "Picture Style" () in the menu by pressing the [ ] or [ ] buttons.
] button and select "Picture Style" () in the menu by pressing the [ ] or [ ] buttons. 3. Press the [ ] or [ ] buttons and choose [ ], [ ] or [ ].
] or [ ] buttons and choose [ ], [ ] or [ ].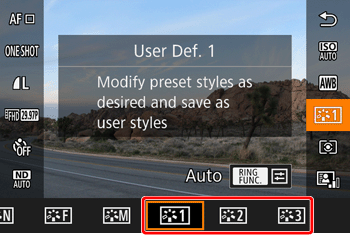
4. Press the [ ] button to display the Setting screen.
] button to display the Setting screen. 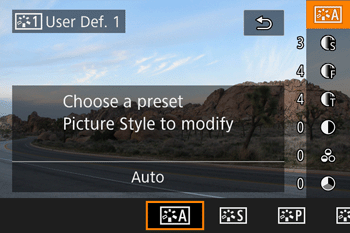
5. Press the [ ] or [ ] buttons to choose an item to modify (), and then adjust the setting () by pressing the [ ] or [ ] buttons.
] or [ ] buttons to choose an item to modify (), and then adjust the setting () by pressing the [ ] or [ ] buttons.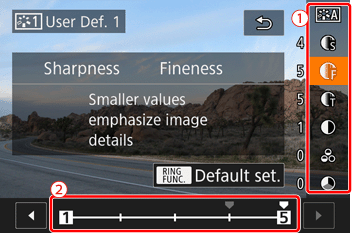
6. Press the [ ] button to complete the settings.
] button to complete the settings.
- You will return to the screen in step 3.
7. Press [ ] once again to reflect the settings, the icon will appear on the screen.
] once again to reflect the settings, the icon will appear on the screen.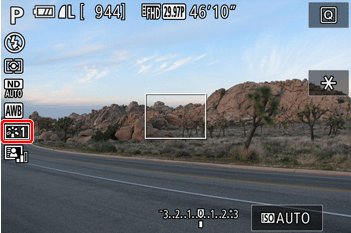
IMPORTANT
- You can also register the Picture Style with the camera by downloading Picture Style file from the Canon website.
- Please use [ CameraWindow ] software for registering the Picture Style with the camera.
NOTE
You can also choose a preset Picture Style by touching [ ] in step 3.
] in step 3.