
The Shutter Is Not Released (EOS M50)
Solution
When the shutter does not release, please refer to the sections below for possible solutions.
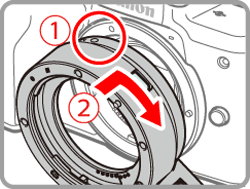
The shutter may not be released if the lens is not securely mounted.
Please mount the lens securely, as shown in the image below.
- Align the mount indexes (the white dots) on the lens and camera, and then turn the lens until it clicks into place.

NOTE
- If using an EF or EF-S lenses, attach the Mount Adapter EF-EOS M securely.
The shutter may not be released if the transfer of information between the camera and the lens is not carried out correctly.
The transfer of information between the camera and the lens is carried out by the electrical contacts on both the camera and the lens.
- If the lens or camera contacts get dirty, please clean them very gently with a clean, dry cloth.
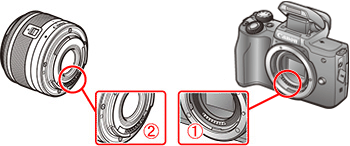
 : Camera Body Contacts
 : Lens Contacts
If after you press the shutter button, the picture is taken 10 sec. later or after you hear a beeping sound, it means the self-timer has been set.
The procedure for canceling the self-timer is explained below.
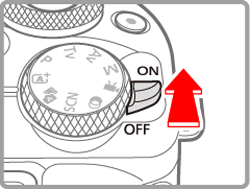
1. Turn the camera on.
2. Press the  button, and then press the
  /
/  buttons to choose [Self-timer].
button, and then press the / buttons to choose [Self-timer].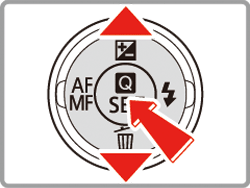
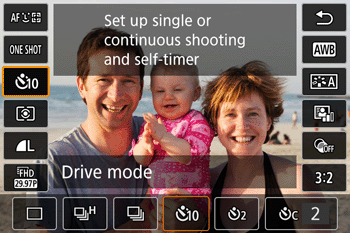
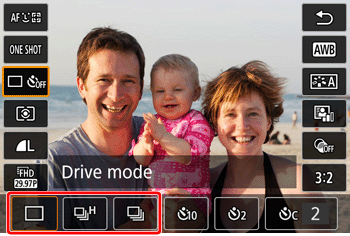
3. Press the  /
/  buttons to choose [
  ] / [
] / [  ] / [
] / [  ], and then press the button.
/ buttons to choose [ ] / [ ] / [ ], and then press the button.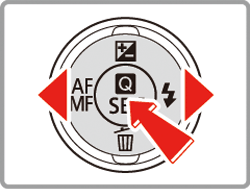
If the [Release shutter w/o lens] option in the [Custom Function (C.Fn)] menu is set to [Disable], the shutter will not be released if a lens is not attached.
To release the shutter when a lens is not attached, please set the [Release shutter without lens] option in the [Custom Function] menu to [Enable] using the following procedure.
IMPORTANT
- The following section explains the setting procedures when the camera's shooting mode has been set to [
 ].
]. - [Release shutter w/o lens] can be set to [Enable] in the following modes:
[  ], [
], [  ], [
], [  ], [ ], [
  ], [
], [  ]
]
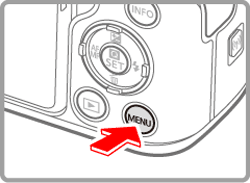
], [ ], [ ], [ ], [ ], [ ]1. Turn the camera on.
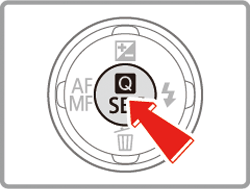
2. Press the MENU button
3. [  ] -> Press the button.
] -> Press the button.
4. Choose the [  5 ] tab -> choose [Custom Function (C.Fn)], and then press the button.
5 ] tab -> choose [Custom Function (C.Fn)], and then press the button.
5. Press the / buttons to choose [3 : Release shutter w/o lens], and then press the button.
/ buttons to choose [3 : Release shutter w/o lens], and then press the button.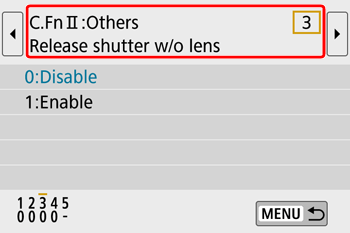
6. Press the / buttons to choose [1: Enable], and then press the button.
/ buttons to choose [1: Enable], and then press the button.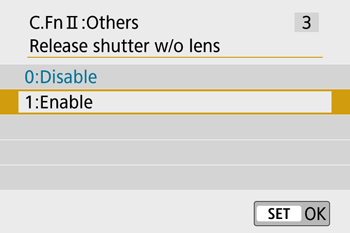
7. The following screen appears on the camera.
Press the MENU button.
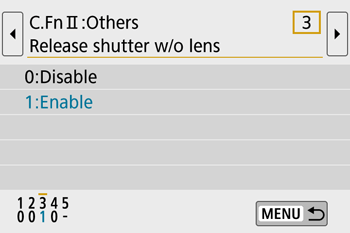
- At the bottom of the screen, the current Custom Function settings are indicated below the respective function numbers.
8. The following screen appears on the camera.
Press the MENU button.
9. Press the MENU button again to return to the shooting screen.
When the memory card becomes full, the following screen will be displayed and the shutter will not be released. Please use a different memory card, or initialize the card.

CAUTION
Formatting erases all data on a memory card. Before formatting, copy images on the memory card to a computer, or take other steps to back them up.
For more information on formatting the memory card, refer to the "User Manual" of your camera. "User Manual" can be downloaded from the Canon Web site.
If you have checked all of the items listed above, but there is still no improvement, please contact a Customer Support Help Desk.