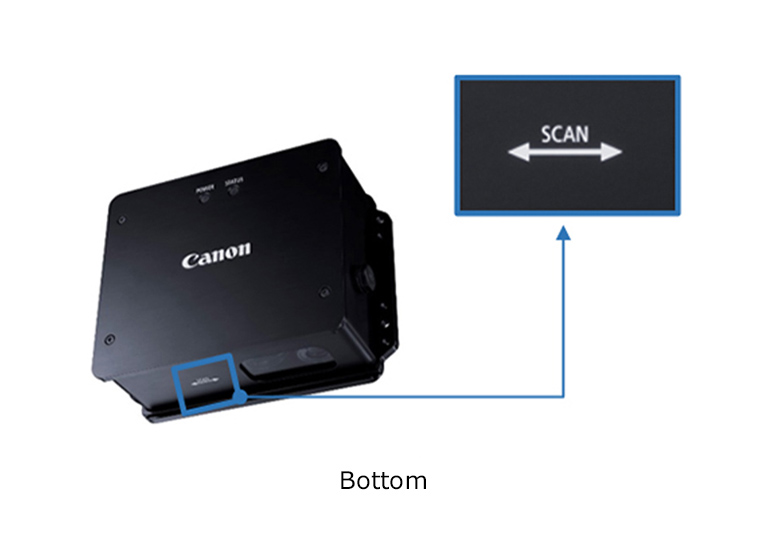
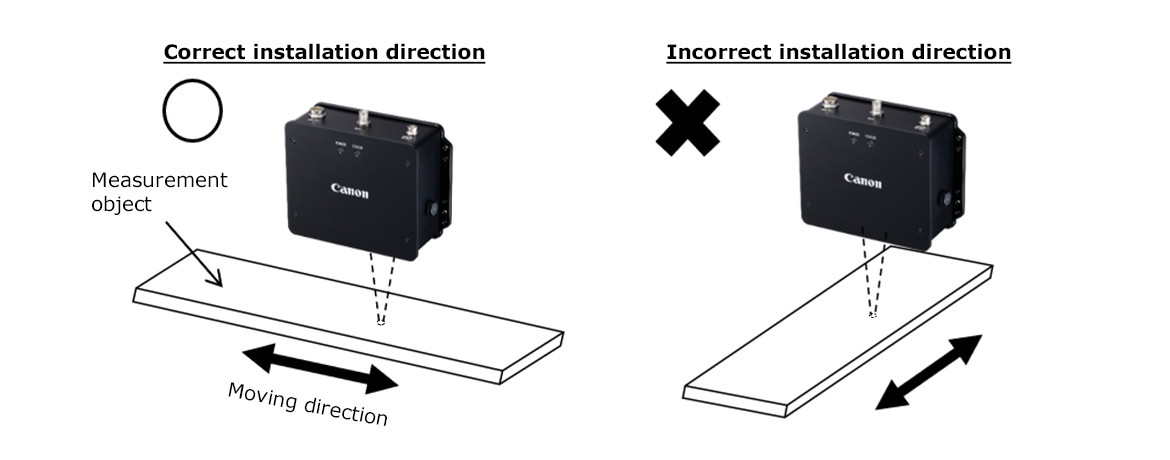
Check the SCAN direction on the bottom of the device, and place the device so that the measurement object matches the direction of movement.
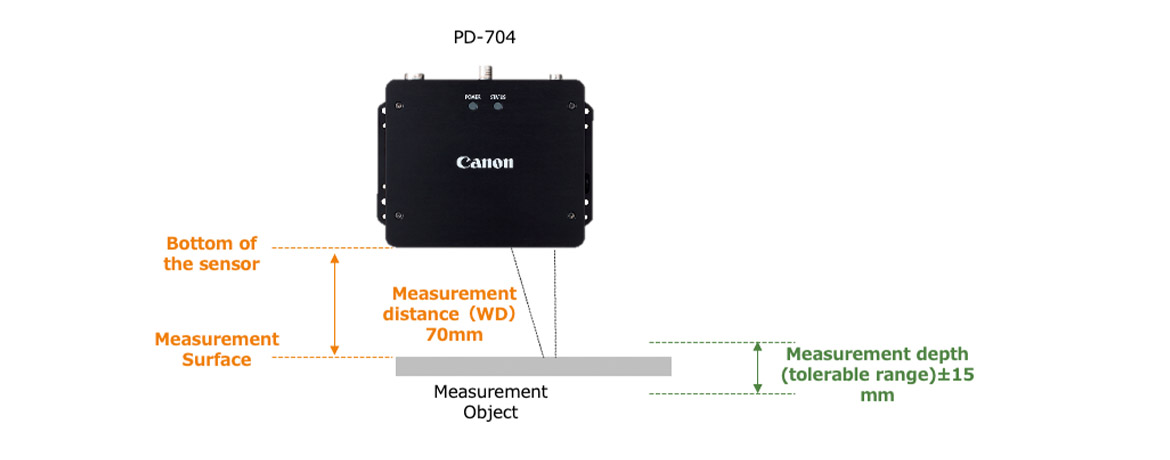
Bottom of the sensor*
Place the measurement object surface at a distance of 70 mm (± 15 mm).
* The outermost part of the body.
Installation is easy by using the measurement distance adjustment tool (optional).
1. Attach the measurement distance adjustment tool to the irradiation section.
2. Install it in a position where the light beams become one.
3. The position where the luminous flux becomes one is 70 mm.
* Used when changing parameters and performing measurements and analysis using a PC app.
Connect the USB cable (sold separately) to the USB connector.
Then, connect it to your PC and start the app.
The device starts up by turning on the customer-supplied DC power supply.
When you press the measurement start button in the app, the LED will illuminate, and measurement will begin.
The lighting of the lamp changes depending on the status of the device.
1. When starting the device
When the power is turned on, the POWER lamp and STATUS lamp will light temporarily. After a certain period of time, only the POWER lamp will remain lit.
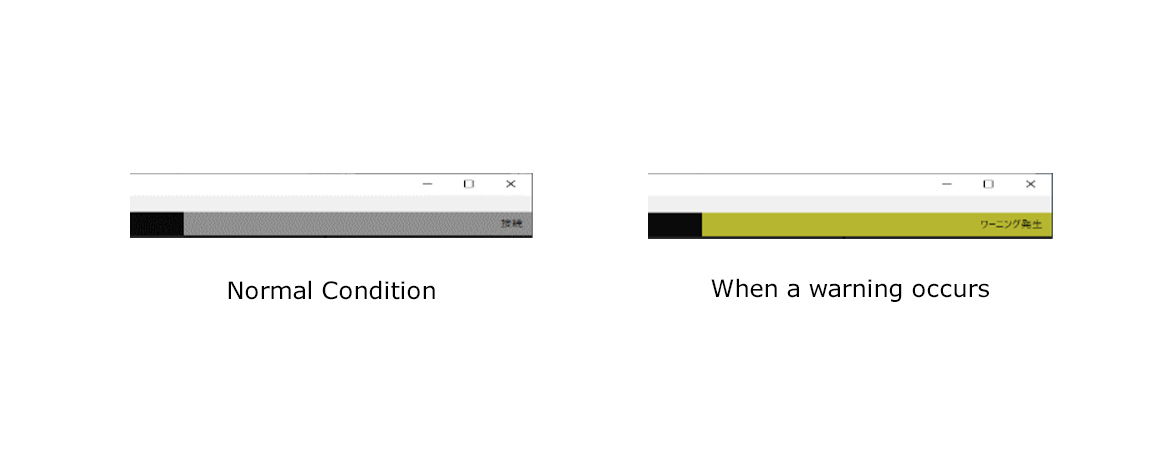
2. When a warning occurs
When a warning occurs, the STATUS lamp flashes. Please check the warning content using the software.
Once measurement is possible, the STATUS lamp will stop blinking.
If the measurement results are abnormal or the temperature approaches the upper or lower limits of the operating temperature, a warning will be displayed. Measurement will continue even when a warning is displayed, but the measurement result may not be accurate. When recover from abnormal condition, the status bar (top of the app) will automatically return to normal after a certain period of time.
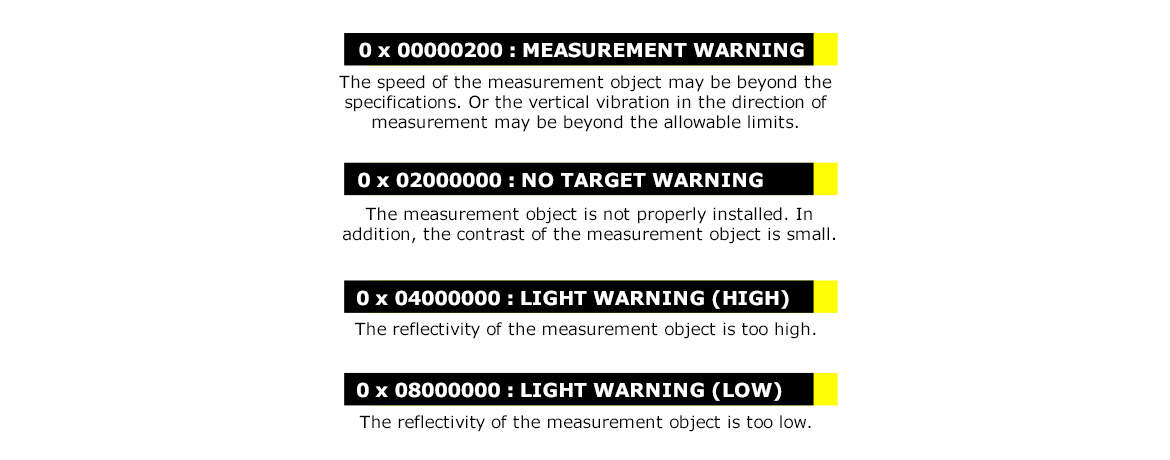
You can check the warning contents after the measurement is complete if you use the app.*1
If you encounter any of the following warnings, you may be able to avoid them by changing the measurement mode.*2
*1 Warnings will be displayed in a summary after the measurement is complete.
*2 For information on each measurement mode, please refer to "Mode function".
You may need to change the mode depending on the measurement object and environment to get a more accurate measurements.
If you get the following warning when measuring in mode 0, try changing the mode according to the warning.
You can change the mode from the "Parameter Setting" screen of the device.
| Mode 0 | Default Setting |
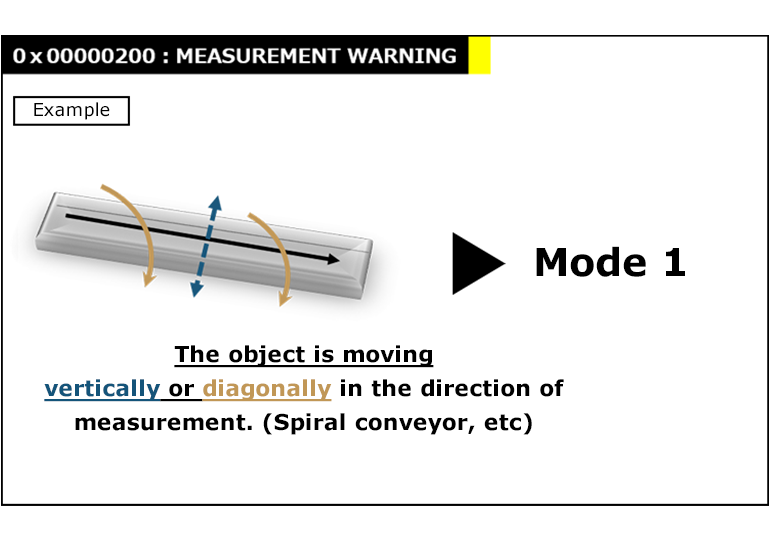
| Mode 1 |
If the object is vibrating vertically in the measurement direction, or if you are measuring movement in a diagonal direction, use this mode setting. * This mode setting may affect accuracy in low speeds (below 100 mm/s). |
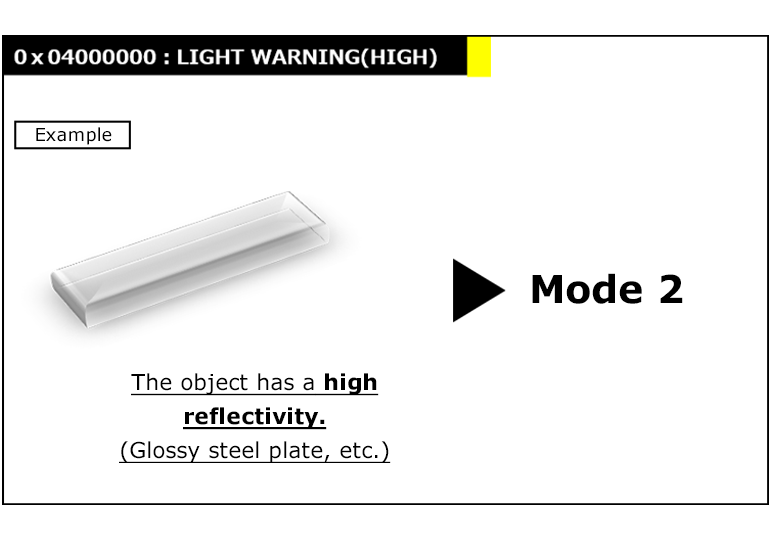
| Mode 2 |
If the object is highly reflective, use this mode setting. * This mode setting may not work with low reflective objects |
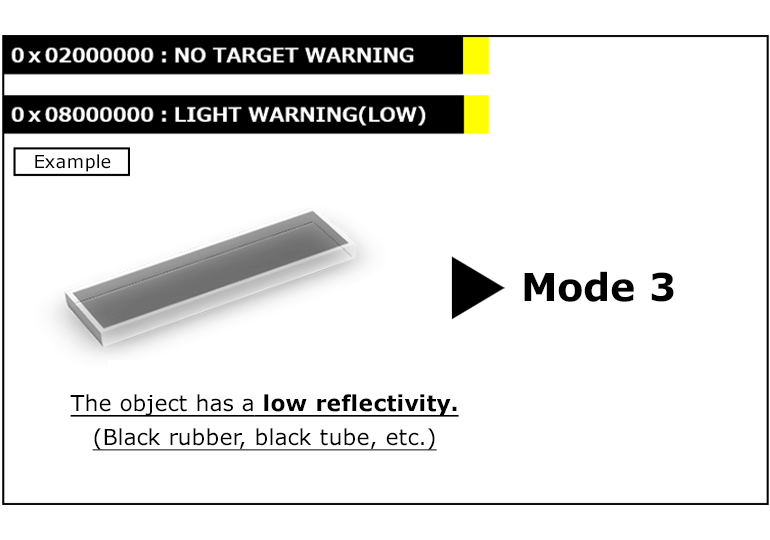
| Mode 3 |
If the object is low reflective, use this mode setting. * This mode setting may not work well with objects that are moving quickly (over 2000 mm/s). |
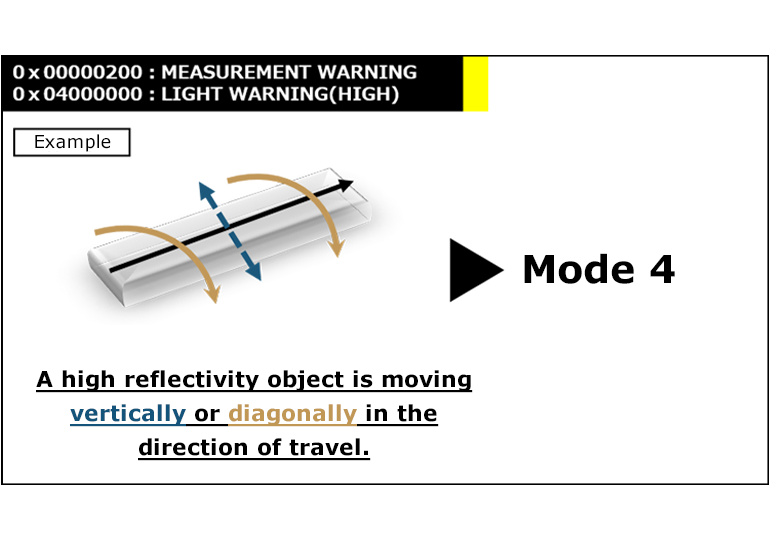
| Mode 4 |
If the object is vibrating a lot and is also highly reflective, use this mode setting. |
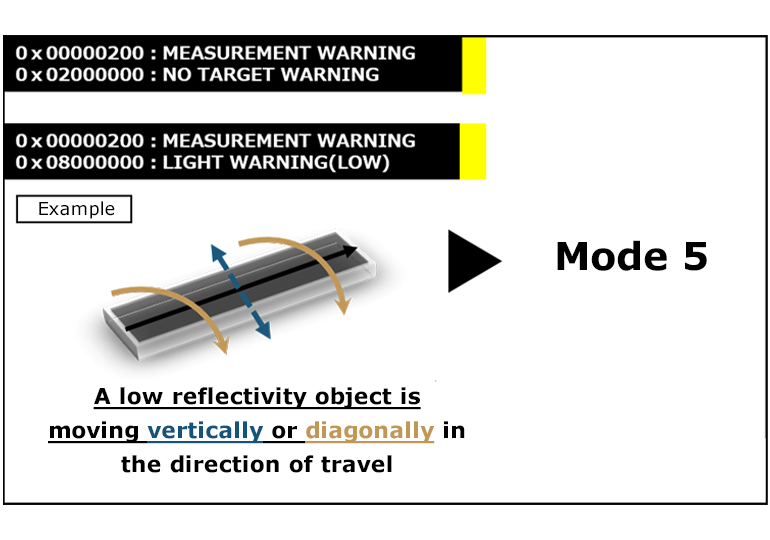
| Mode 5 |
If the object is vibrating a lot and is also low reflective, use this mode setting. |