Sending images from a camera to an Android smartphone (PowerShot G9 X)
Solution
You can send images to smartphones and tablet computers that have Wi-Fi functions.
Procedures for the following two connection methods are explained in the following sections:
A: Registering to the <Mobile device connect> ( ) button and connecting.
 ) button and connecting.
B: Making connections via the Wi-Fi menu.
Images can also be sent via NFC connections using Android smartphones (installed with OS version 4.0 or later) that support NFC. For more information, please refer to Sending images from a camera to an Android smartphone via an NFC connection(PowerShot G9 X)
IMPORTANT
- In the following explanation, smartphone setting procedures are indicated by the
 icon, and camera setting procedures are indicated by the
  icon.
icon. - In this article, Android™ smartphones and tablets are collectively referred to as 'smartphones'.
NOTE
- Keep your fingers or other objects off the Wi-Fi antenna area. Covering this may decrease the speed of your image transfers.
- Connections require that a memory card be in the camera.
- Depending on the condition of the network you are using, it may take a long time to send movies. Be sure to keep an eye on the camera battery level.
- When sending movies to smartphones, note that the supported image quality varies depending on the smartphone. For details, refer to the smartphone user manual.
- On the screen, wireless signal strength is indicated by the following icons.
-[  ] high, [
  ] medium, [
  ] low, [
  ] weak
 ] high, [
  ] medium, [
  ] low, [
  ] weak
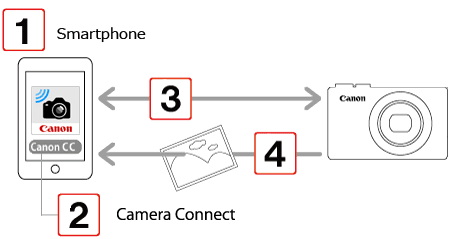
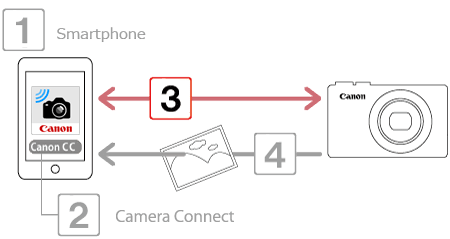
- The procedure for using the Wi-Fi function to send images from a camera to a smartphone is explained in the following four steps. Proceed in order from Step 1.
 Step 1: Confirming the smartphone's OS version
  Step 2: Installing Camera Connect on the smartphone and setting Wi-Fi to ON
 Step 3: Connecting the camera to the smartphone
 Step 4: Sending images to the smartphone
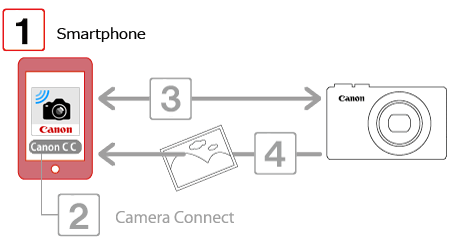
 1. Check the smartphone’s specifications.
To confirm the Android™ OS version information, check the [Settings] menu (  )
)  [About device]
  [ Android version ].
 )
)  [About device]
  [ Android version ].
IMPORTANT
Please refer to the related information for details on the smartphones which can be connected with a camera wirelessly.
NOTE
- Turning off the sleep function of the smartphone is recommended.
- The setting procedures and items may differ depending on the Android™ OS version installed on your smartphone.
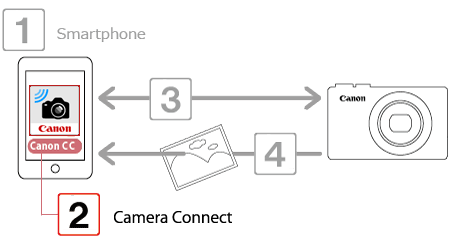
Download Camera Connect from Google Play™ and install it on the smartphone.
If Camera Connect is already installed on the smartphone, please proceed toStep 3: Connecting the camera to the smartphone.
NOTE
- The example procedure is shown in Android™ OS 4.0
- The example screen images from the smartphone are used to explain the setting procedures and may differ from the screens shown on other models. For more information on the model you are using, refer to your smartphone’s instruction manual.
- Interface or functions of Camera Connect are subject to change, for application improvement or update. In such a case, features of Camera Connect may differ from sample screens or operation instructions in this explanation.
 1. Touch the [Play Store] application on your smartphone to access Google Play™.
IMPORTANT
・The Camera Connect application is free, but separate connection charges for accessing Google Play™ may be applicable.
・A Google account is necessary to download Camera Connect.
・It is not possible to download Camera Connect to smartphones not equipped with GooglePlay™.
・Downloading the application via a cellular network may take longer than downloading via Wi-Fi.
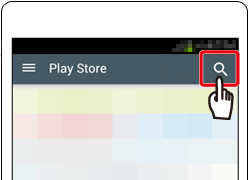
 2. Touch the search icon.
 3.
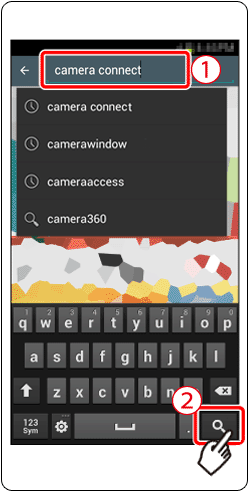
3.  Enter [Camera Connect] in the search field, and then
  touch [Search].
 4. Choose [Camera Connect] from the displayed search results, and install it on the smartphone.
After installation has been completed, tap the [Home] button to return to the Home Screen.
 5. Touch the menu key, and then touch [Settings] (
 ).
). 6. Confirm that the smartphone is not set to [Airplane mode].
 7.
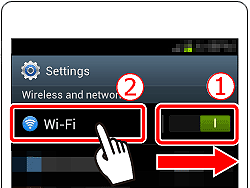
7.  Set the [Wi-Fi] switch to [ON], and then
  touch [Wi-Fi].
- Procedures for using the two methods below to send images to a smartphone are explained in the following sections.
A: Registering the smartphone to the < > button and connecting.
[  > button and connecting.
 ] Pressing the Mobile Device Connect button to connect with the smartphone, and saving images from the camera to the smartphone.
NOTE
Simply press the < > button to connect the devices. This simplifies sending images to a smartphone.
 > button to connect the devices. This simplifies sending images to a smartphone.
B: Connecting via Wi-Fi.
[  ] Pressing the Wi-Fi button to connect with the smartphone, and saving images from the camera to the smartphone.
NOTE
You can connect the camera to a smartphone as you would connect it to a computer or other device. Multiple smartphones can be added.
A:  Pressing the Mobile Device Connect button to connect with the smartphone, and saving images from the camera to the smartphone.
 Pressing the Mobile Device Connect button to connect with the smartphone, and saving images from the camera to the smartphone.
 A-1. Press the camera’s [ Mobile device connect ] (
 ) button.
 (Hereafter referred to as the < > button.)
 > button.)
NOTE
- When setting up Wi-Fi for the first time, the camera nickname registration screen will be displayed.

- This nickname will be displayed on [Select a Device] screen when connecting to other devices via Wi-Fi.
- If the [Device Nickname] screen is displayed, choose [OK]. (The camera model name (G9 X) is set as the nickname by default.)
- To change the camera’s nickname, touch the [Nickname] field and enter the desired nickname using the keyboard displayed. After you have finished entering the nickname, press the <MENU> button, and then touch [OK].
 A-2. Touch [
  ] when the screen below is displayed.
 A-3. The camera’s SSID is displayed on the screen.
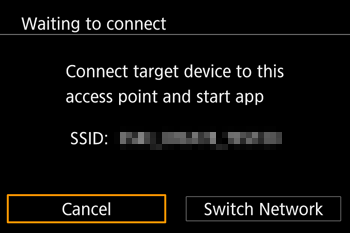
REFERENCE
- When you are in the vicinity of an access point that you have previously connected to, the camera will automatically connect to it.
- To change access points, select [Switch Network] from the screen that will be displayed when the connection is being established.
 A-4. Choose the SSID (network name) displayed on the camera’s screen from the list of access points displayed on the smartphone.
NOTE
 For better security, you can display a password on the screen by accessing MENU and choosing [
  ] tab > [Wi-Fi Settings] > [Password] > [On]. In this case, enter the password displayed on the camera in the password field on the smartphone when it is displayed.
- After confirming that the smartphone and the camera are connected, touch the [Home Button] to return to the [Home Screen].
 A-5. Tap the [Canon Connect] (
 ) application icon on the smartphone to start [Camera Connect].
- After the camera recognizes the smartphone, a device selection screen is displayed.
 A-6. Choose the smartphone you want to connect with, and then press the <
 > button.

 A-7. After a connection is established with the smartphone, the smartphone’s name is displayed on the camera. (This screen will close in about one minute.)
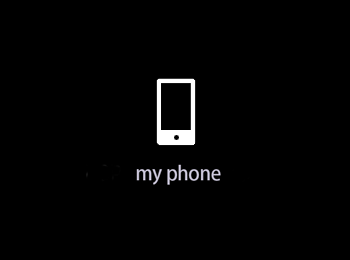
 A-8. Touch [Images on camera ] in Camera Connect.
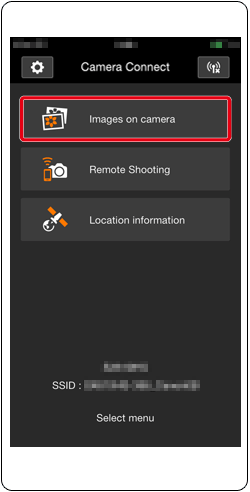
REFERENCE
- Once you have connected to a smartphone initially via Wi-Fi by pressing the <
 > (Mobile device connection) button, you can simply press the <
 > (Mobile device connection) button after that to connect again for viewing and saving camera images on connected devices.
 - One smartphone can be registered to the <
 > (Mobile device connection) button.
 - Once a connection has been established with a smartphone, you can automatically reconnect to the registered device by simply pressing the <
 > button, even if the camera has been turned off.
NOTE
- To clear smartphones registered to the camera, display the menu screen, choose
 [Mobile Device Connect Button] on the [
  ] tab, and then touch
  [OK] on the confirmation screen to complete the process.

If you wish to register a different smartphone to the < > button, clear the one currently registered first.
 > button, clear the one currently registered first.
B : [
 ] Pressing the Wi-Fi button to connect with the smartphone, and saving images from the camera to the smartphone.
 B-1. Press the [Playback] (
 ) button to turn the camera on.
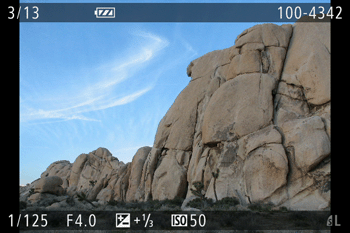
- The playback screen appears.
 B-2. Press the <
  > button, display the menu screen, and choose [Wi-Fi] located on the right side of the screen.

NOTE
- When setting up Wi-Fi for the first time, the camera nickname registration screen will be displayed.

- This nickname will be displayed on [Select a Device] screen when connecting to other devices via Wi-Fi.
- If the [Device Nickname] screen is displayed, choose [OK]. (The camera model name (G9 X) is set as the nickname by default.)
- To change the camera’s nickname, touch the [Nickname] field and enter the desired nickname using the keyboard displayed. After you have finished entering the nickname, press the <MENU> button, and then touch [OK].
 B-3. Touch [
  ] when the following screen is displayed.
 B-4. Touch [Add a device].
 B-5. The camera’s SSID is displayed on the screen.
 B-6. Choose the SSID (network name) displayed on the camera’s screen from the list of access points displayed on the smartphone.
NOTE
 For better security, you can display a password on the screen by accessing MENU and choosing [
  ] tab > [Wi-Fi Settings] > [Password] > [On]. In this case, enter the password displayed on the camera in the password field on the smartphone when it is displayed.
- After confirming that the smartphone and the camera are connected, touch the [Home Button] to return to the [Home Screen].
 B-7. Tap the [Canon Connect] (
  ) application icon on the smartphone to start [Camera Connect].
- After the camera recognizes the smartphone, a device selection screen is displayed.
 B-8. Choose the smartphone you want to connect with, and then press the <
 > button.
 B-9. When connecting to a smartphone for the first time, the following screen will be displayed on the camera. In this case, please touch [Yes].
- You can now use the smartphone to browse, import, or geotag images on the camera or shoot remotely.
REFERENCE
- You can change privacy settings for registered smartphones
 B-10. The following screen appears.
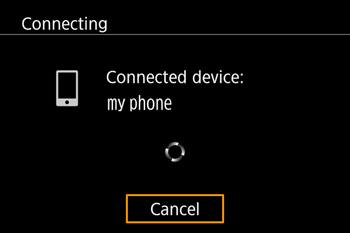
 B-11. Once you have connected to the smartphone, a screen like the one below will appear.
NOTE
- You can connect to smartphones that you have already connected to by choosing them on the [Select a Device] screen in step B-4.
- After you have accessed the Wi-Fi menu once, you can access it again by pressing the <
 > button. The recent target device is listed first, so you can easily connect again by selecting it. To add a new device, display the device selection screen, and then configure the setting. If you prefer not to display recent target devices, chose the [
  ] tab from the menu screen, choose [Wi-Fi Settings]
  [Target History]
  [Off].
 - To add multiple smartphones, repeat the above procedures starting from step B-3.
 B-12. Touch [Images on camera ] in Camera Connect.
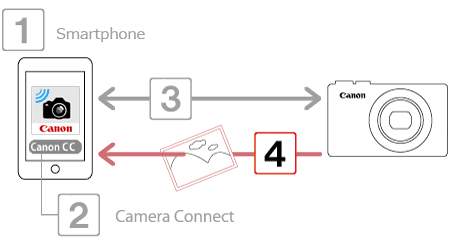
 1. Use the smartphone to import images from the camera to the smartphone.
- When the camera is connected to the smartphone, a list of the images on the camera will appear in [Camera Connect].

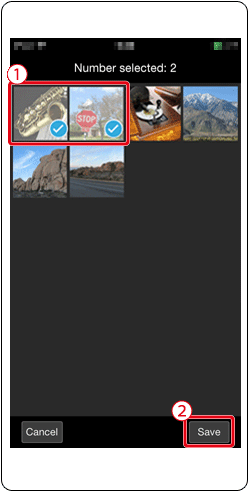
 2. After the screen refreshes,
  choose the desired images, and then
  touch [Save] on the bottom right of the screen. The selected images will be saved to the smartphone.
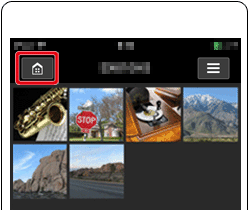
 3. After the images have been saved, touch the [Home] button to return to the menu screen.
 4. To end the connection, touch the [
  ] icon displayed in the upper right of the screen, and then touch [Yes].
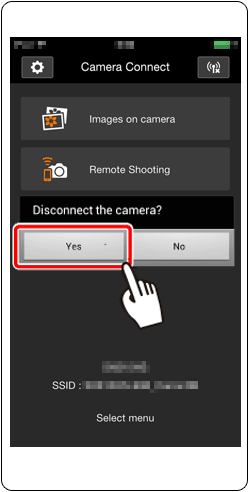
- When the connection is ended, the camera will automatically turn off.
NOTE
- To control the camera manually, either end the connection from the smartphone or restart the camera after pressing the power button to turn it off momentarily.
*Android™, and Google Play™ are trademarks of Google Inc.


