
Computer Software Settings - Fine Art
Print with Accuracy and Colour Consistency
After processing your photograph and selecting the type of paper, you’re ready to print. When using fine art paper, it’s important to minimize failures caused by incorrect settings or operational errors.
To achieve this, you need to create an environment that accurately checks colour rendition on both your monitor and printer, and establish a workflow with the correct print settings. The PRO series offers an efficient and user-friendly workflow for printing with familiar software like Photoshop.
Monitor and Printer Adjustments
Notes on monitor calibration
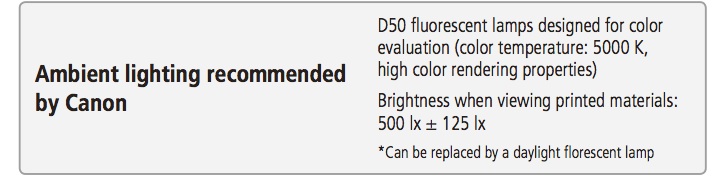
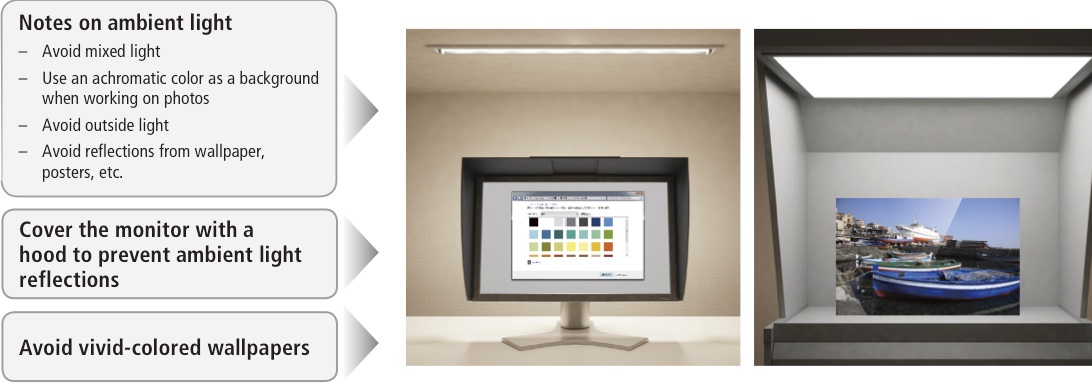
Ambient light significantly influences the perception of colours displayed both on a monitor and on a print.
Therefore, it is important to select the appropriate ambient light (i.e. a fluorescent lamp) when working on colour management.
Monitor Calibration
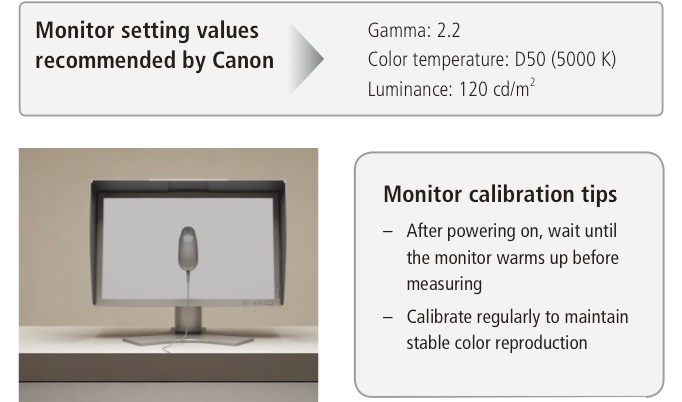
Changing colours in photographic data on an uncalibrated monitor often causes a variation in colors between the monitor and printer. This is why the monitor needs to be adjusted in advance. Using the monitor’s colour calibration function, adjust the settings.
For even higher adjustment accuracy, make adjustments using a measuring instrument. Monitor adjustment using a monitor calibration tool measures the monitor’s setting values automatically with a color sensor, and adjusts the colour tone by creating an ICC profile for the monitor. In addition, by setting the created ICC profile on the computer, you can display accurate colour tones.
Printing from Photoshop
An ICC profile can be specified directly from Adobe Photoshop when printing photo data.
Note that Adobe Photoshop’s printing function uses the Adobe CMM (Colour Management Module) color conversion engine. Since this engine uses a different colour conversion method from other application software, your prints may show different colour tones even when the printing conditions — including the paper — are the same.
Photoshop print settings (for both Windows and macOS)
In the Colour Management pane of the Photoshop Print Settings window, select Photoshop manages colours in the Colour Handling pull-down menu. Specify the appropriate profile in the Printer Profile menu to suit the loaded paper.
Deselect the Black Point Compensation checkbox. The Canon printer profile assumes that this Black Point Compensation checkbox is turned off. If it is selected, the shadows may be printed lighter than expected.
Printer driver settings:
Windows: Open the Manual Colour Adjustment dialog box from the Printer Properties window. In the Matching tab, select None under the Colour Correction pull-down menu.
macOS: Selecting Photoshop Manages Colours overrides printer driver settings, so no additional setting is required.
Photoshop print settings (Adobe Photoshop CS6)

Effect of Rendering Intent Choice on Final Prints
When the colour gamut of a monitor differs significantly from that of the printer‑and‑paper combination, colours beyond the monitor’s gamut are reproduced on the printer using rendering intent.
Among the available rendering intent methods, you can choose Saturation or Perceptual.
On media with a smaller reproducible colour range — such as fine art paper or specialty paper — selecting different rendering intent methods is more likely to result in noticeable differences in colour tones.
Perceptual (recommended): Prints using the colour space that the printer can reproduce. Select this option when you want the print to closely match the appearance on your monitor, as it correctly reflects the characteristics of the data displayed on the screen.
Saturation: This method reproduces images even more vividly than the Perceptual method.